Step by Step Guide
How to build your new road bike out of the box
Our road bikes are partially disassembled for transport. However, with some helpful tips, you can get your bike ready for riding in just a few simple steps. Here’s our step by step guide!
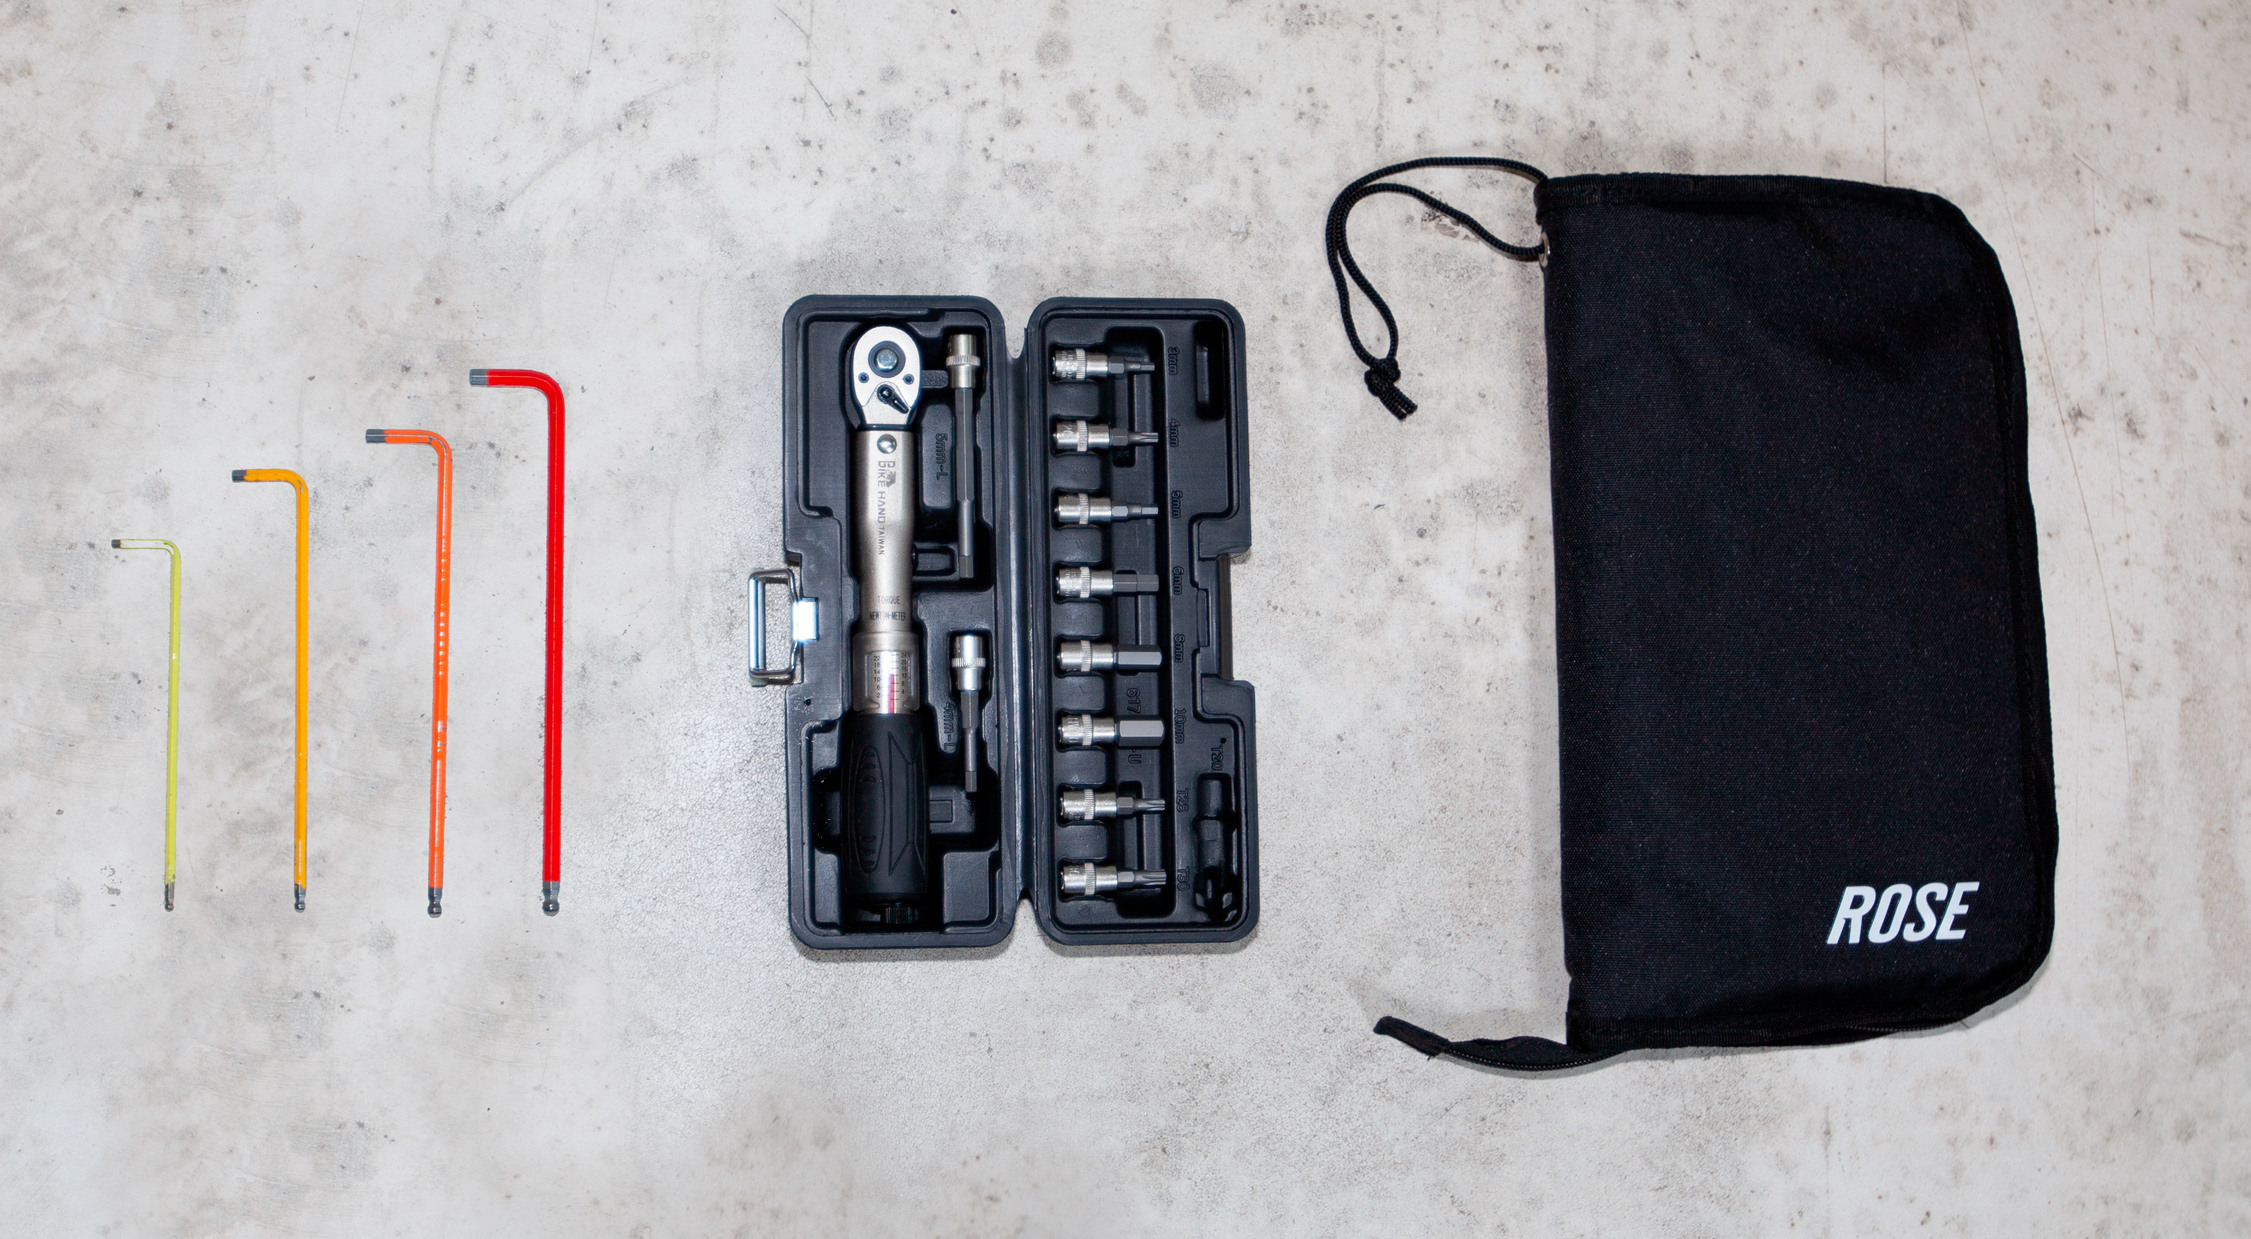
You need:
- Hex wrenches (4, 5, 6, 8 mm)
- T25 wrench
- Torque wrenches
- Pedal wrench (where required)
- Handbook
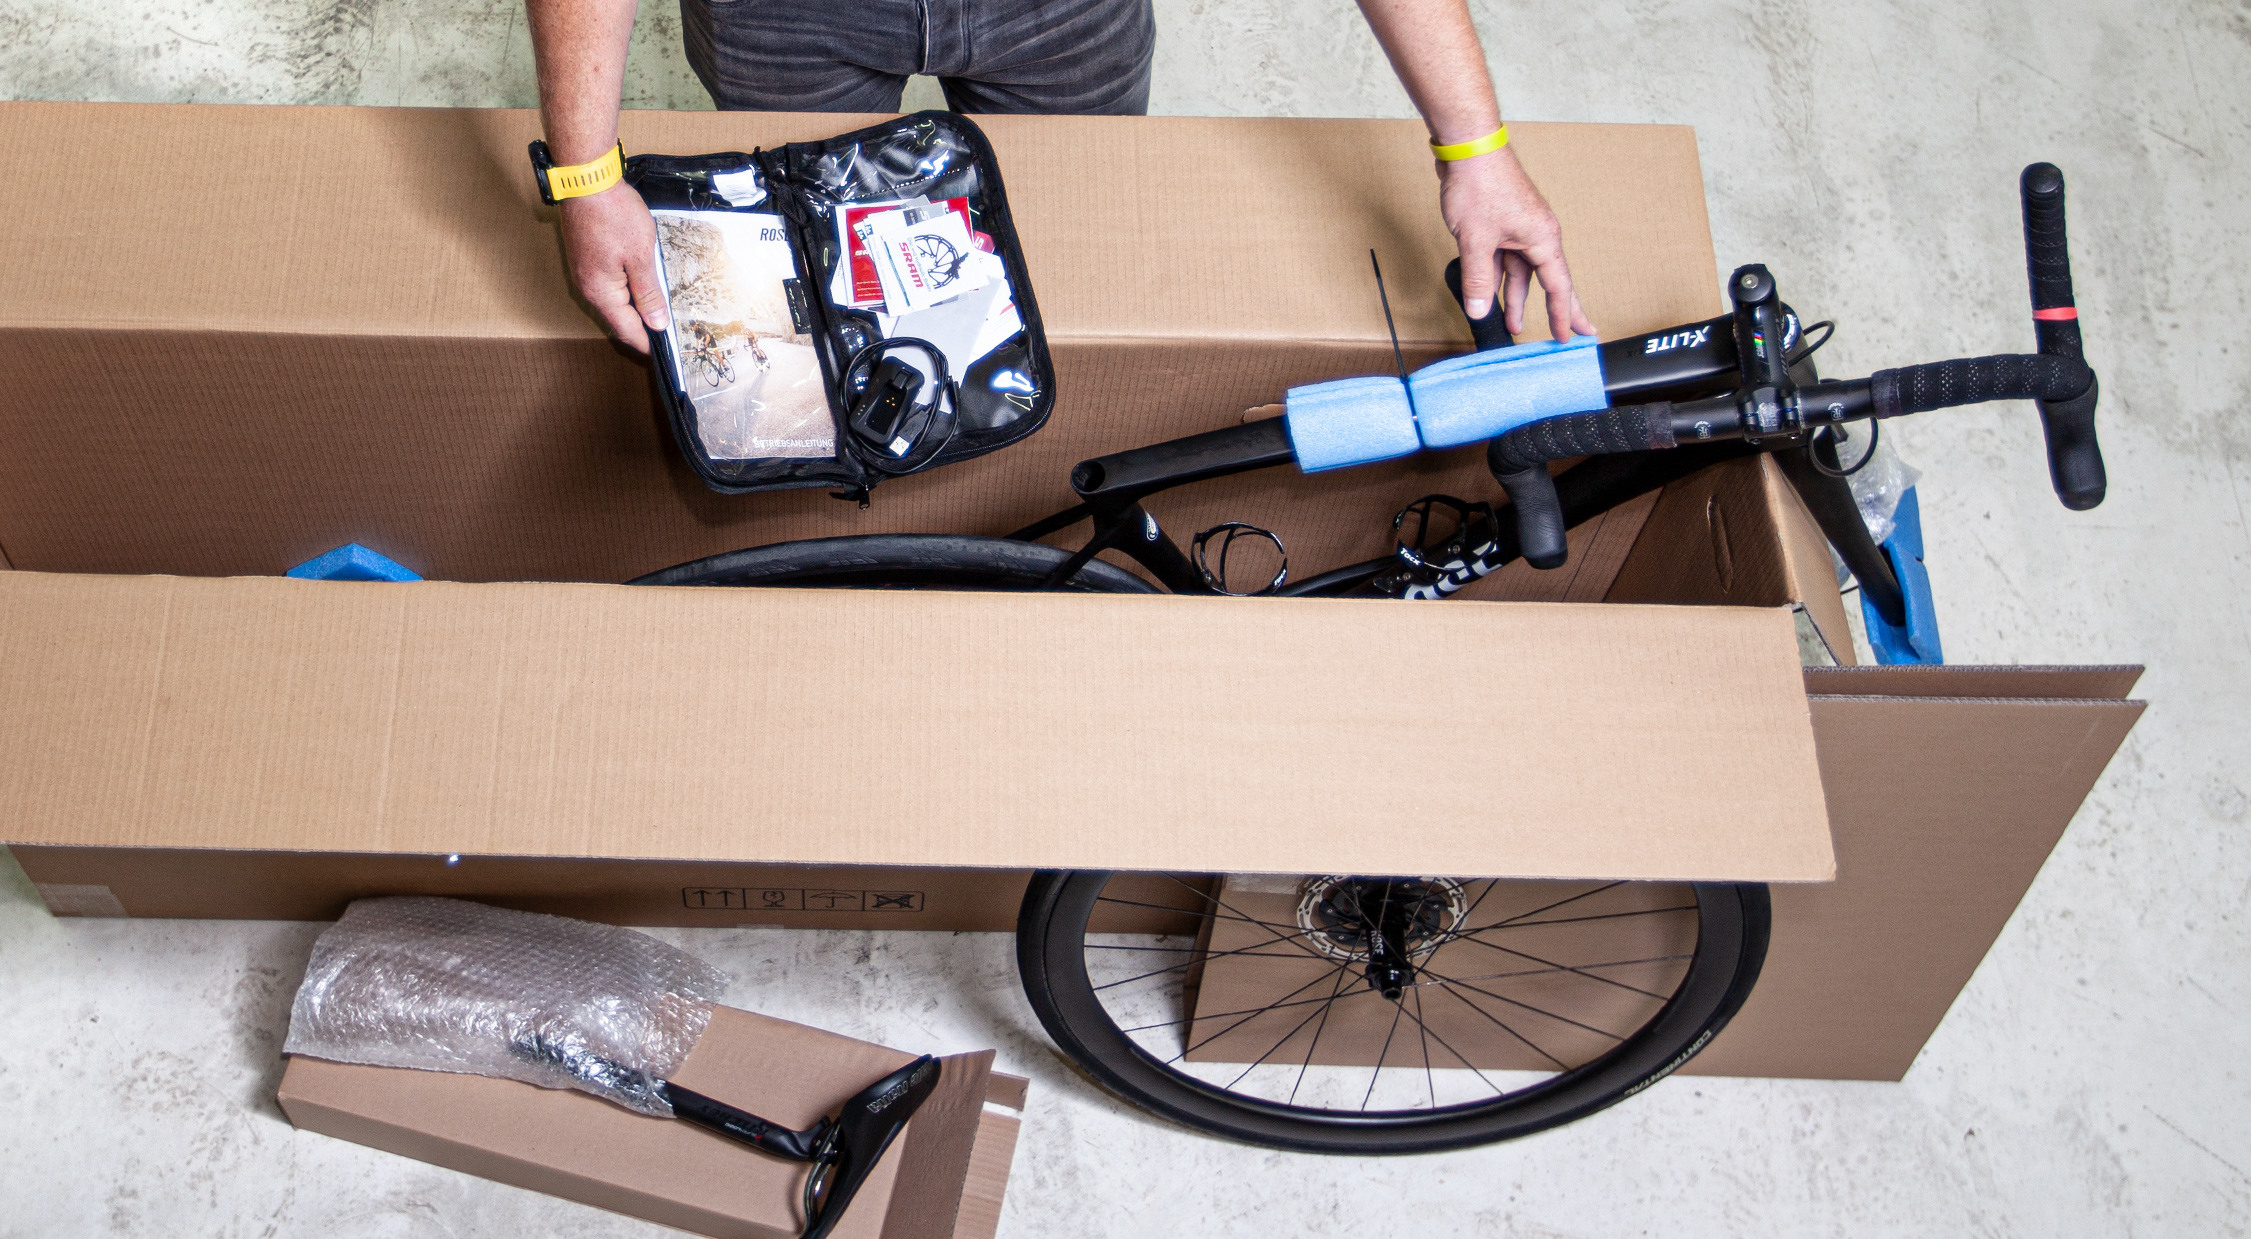
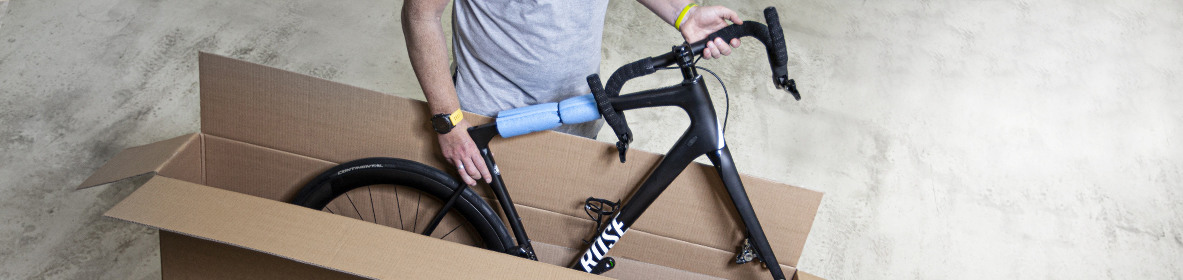
Step 1: Unboxing
- Remove your bike and all small parts from the box
- Inside the bike box, you’ll find 1-2 small parts boxes
- Remove all packaging from the frame
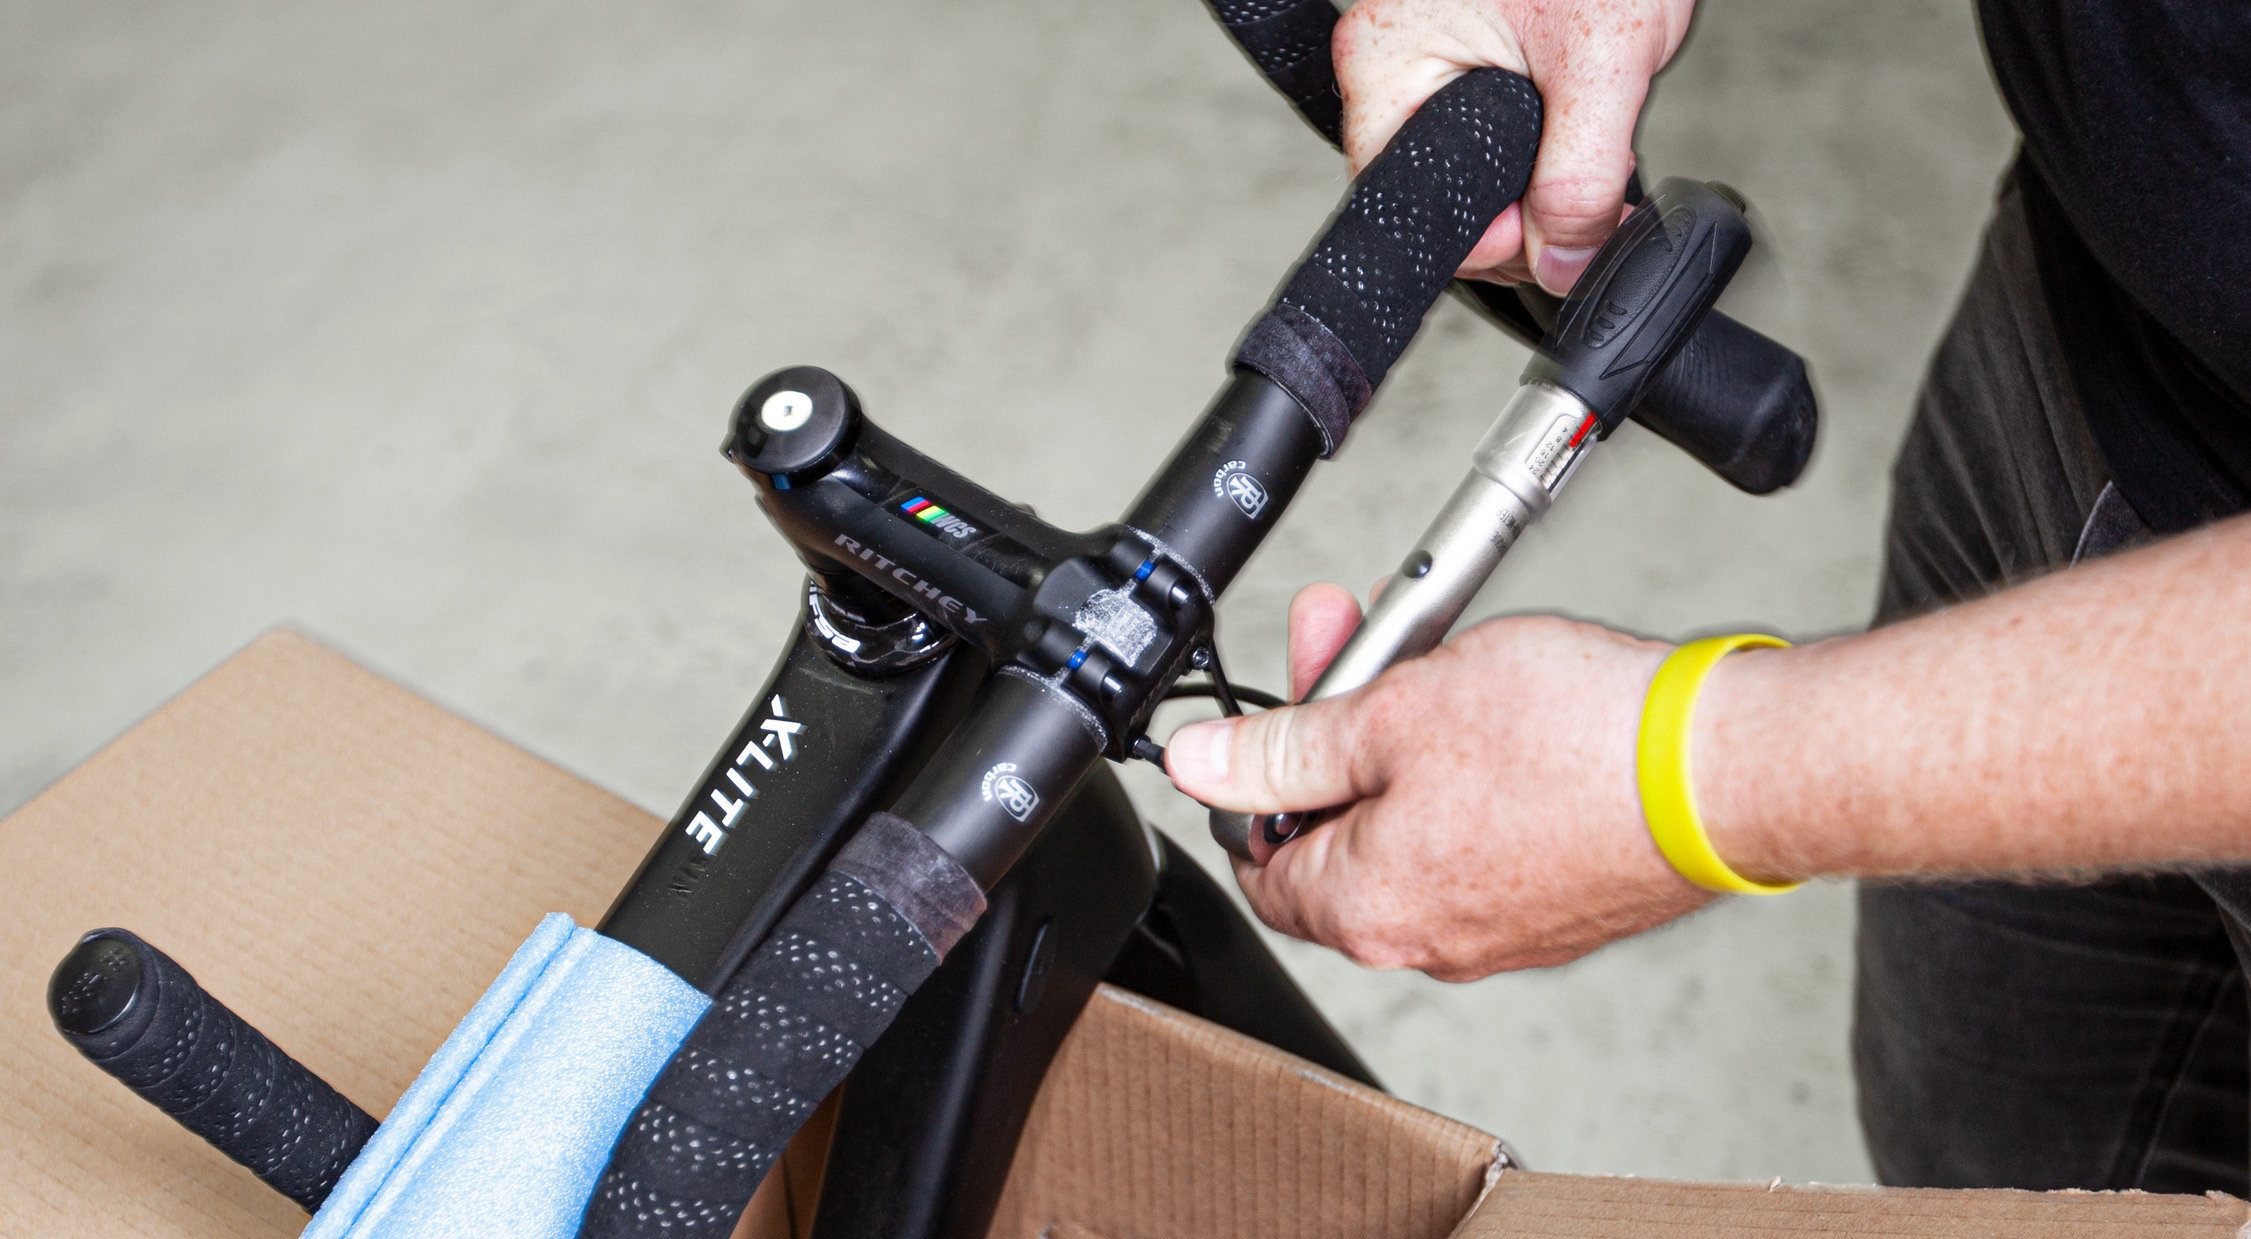
Step 2: Handlebar
- Loosen the bolts on the stem
- Straighten the bars
- Tighten the bolts in a crossing pattern, following the instructions you can find in the handbook
- Remove the rubber straps from the brake levers
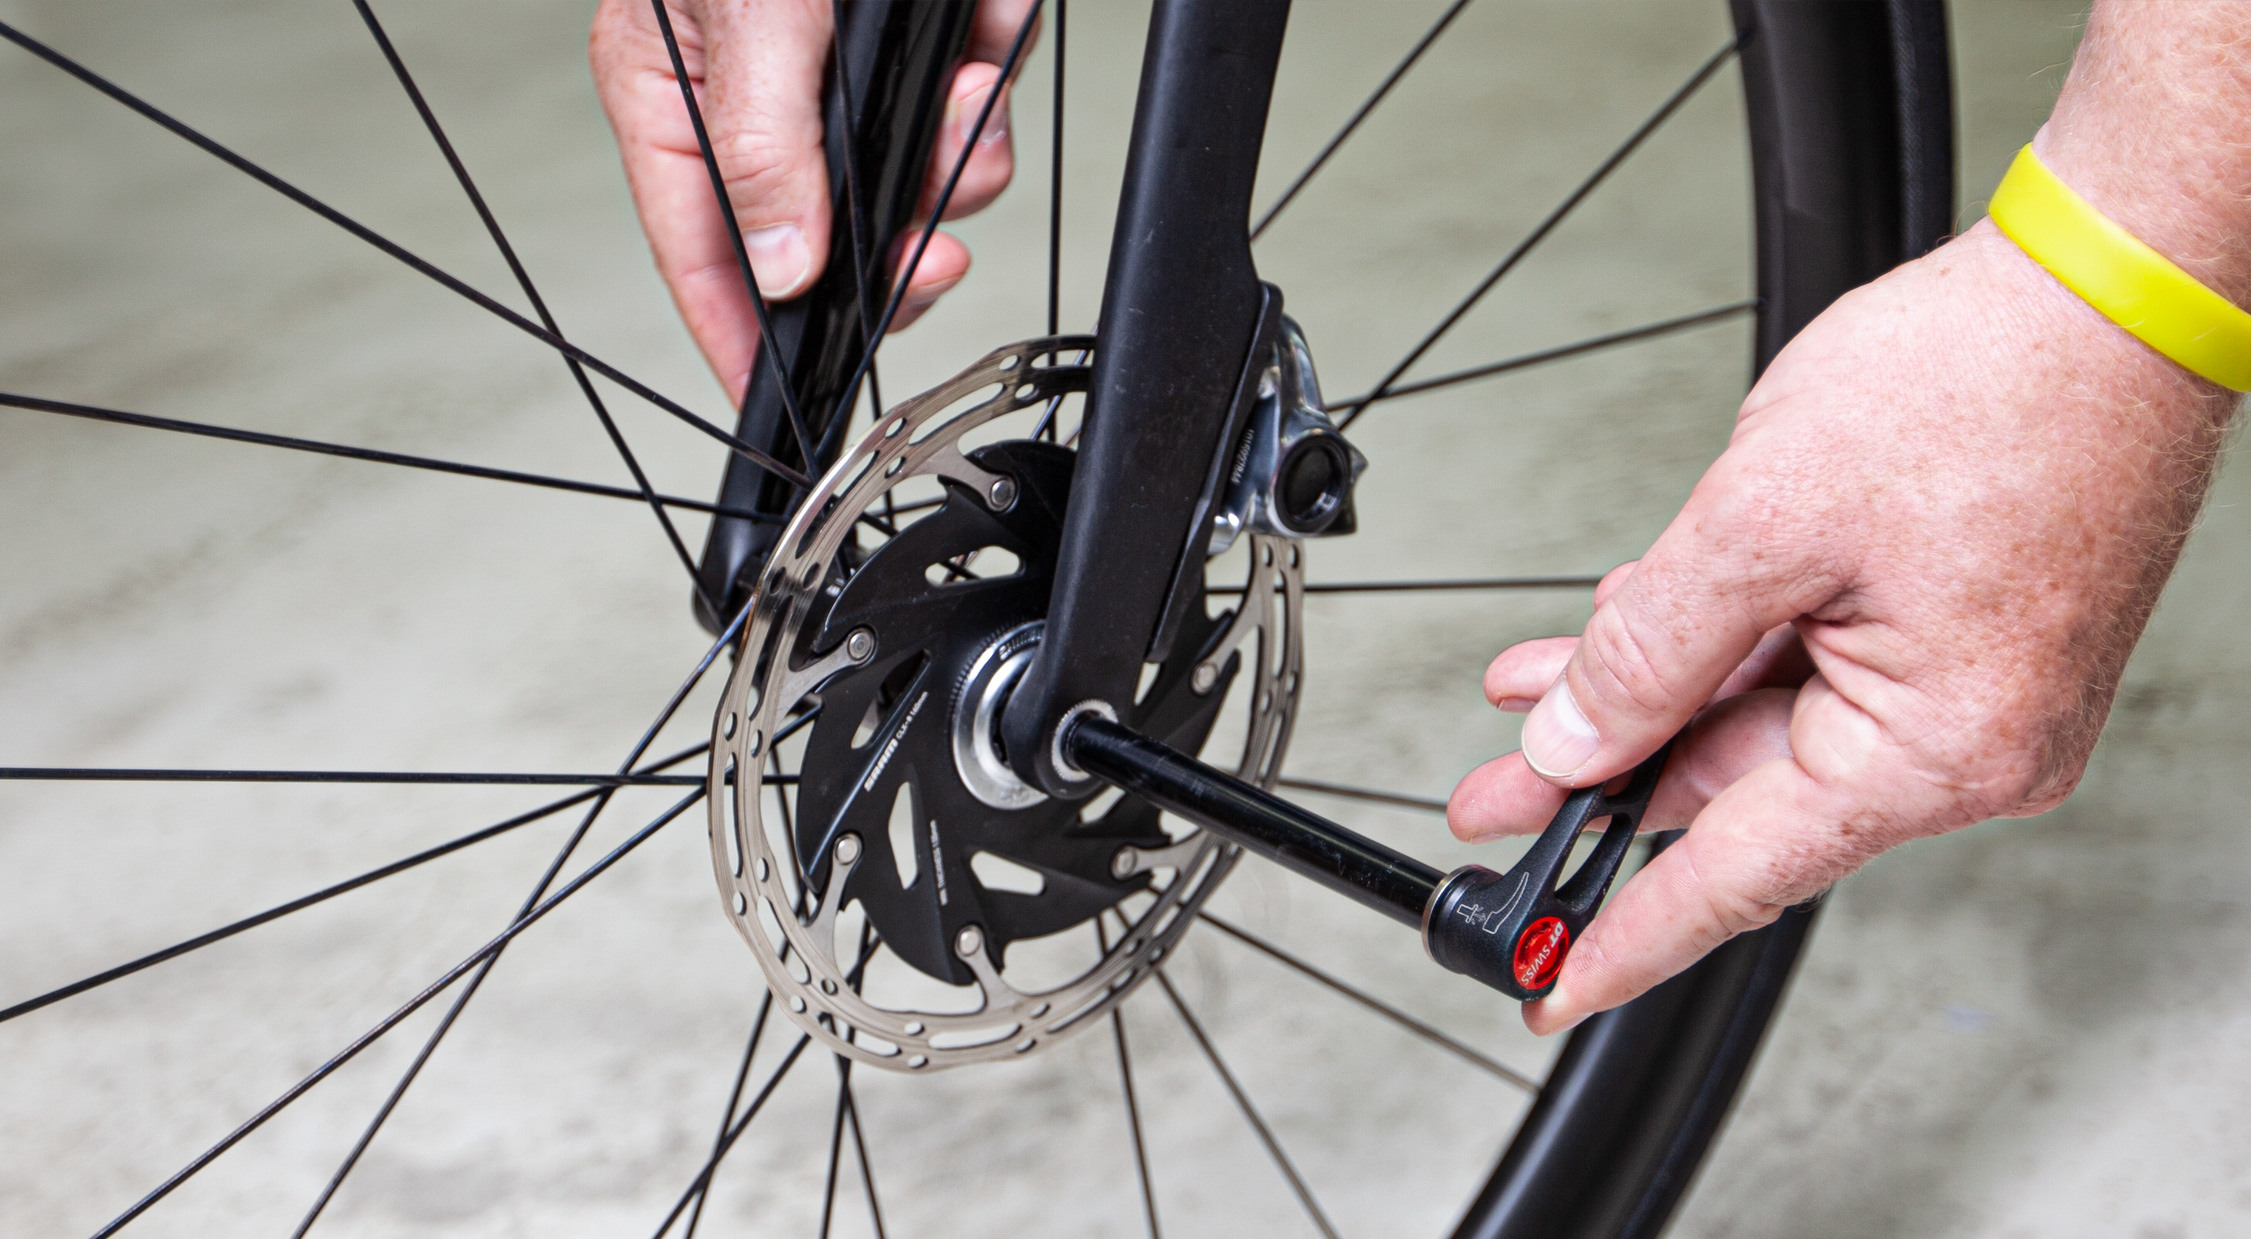
Step 3: Put the front wheel in
- Remove the plastic spacer from your disc brake
- Remove the thru axle and insert the front wheel
- Push the thru axle in and tighten it following the manufacturer’s instructions in the handbook
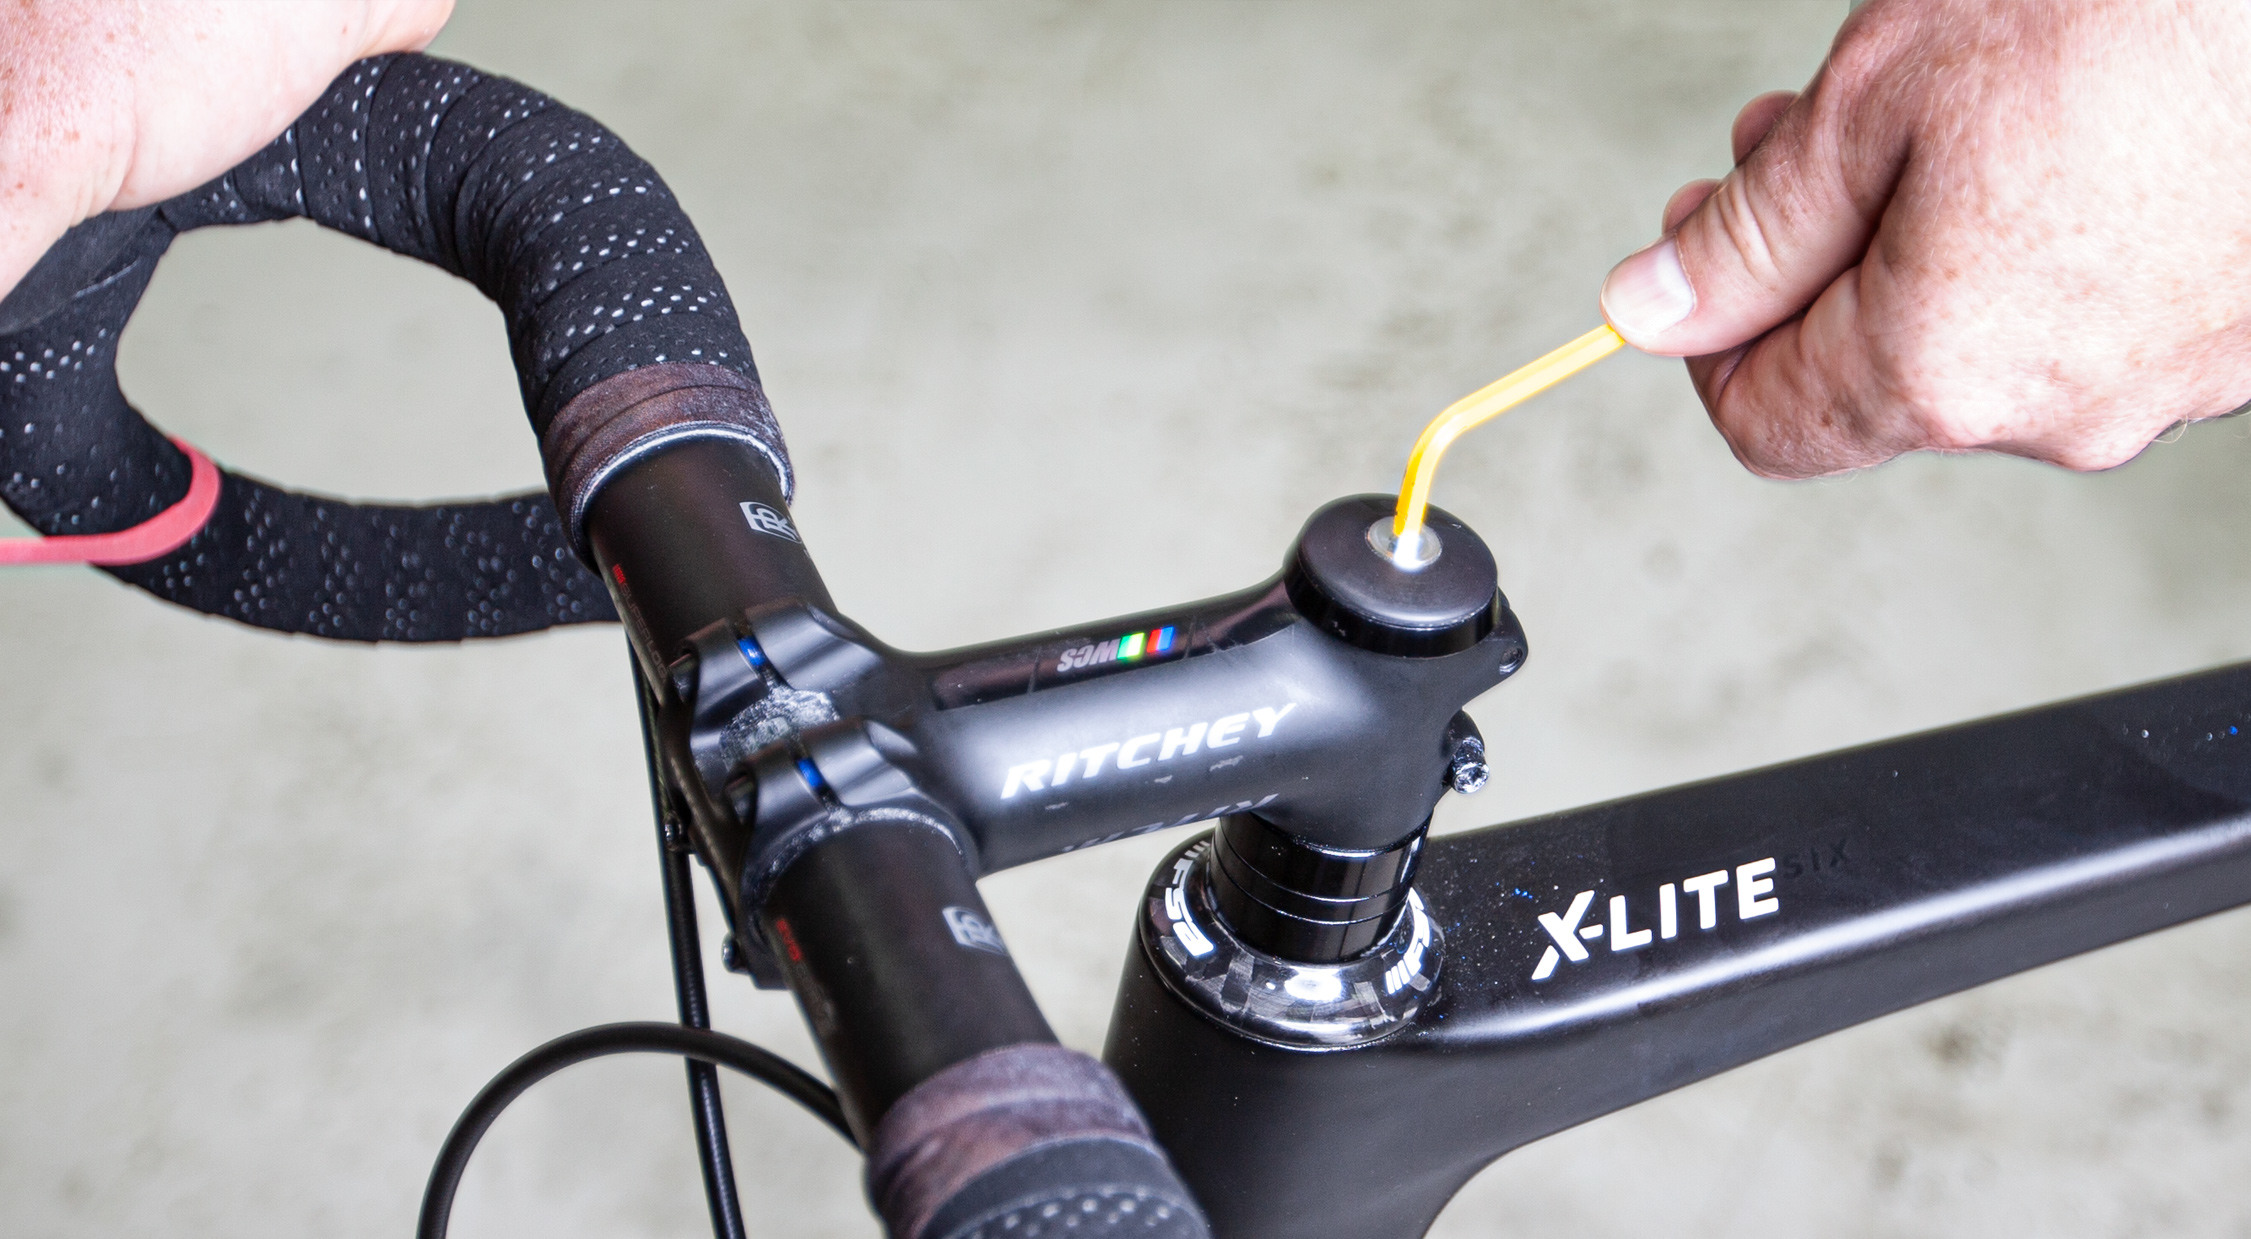
Step 4: Check the headset for play
- Squeeze the front brake lever
- Move the bike back and forth
- If there’s any play inside the headset, adjust the headset play according to the instructions given in the handbook
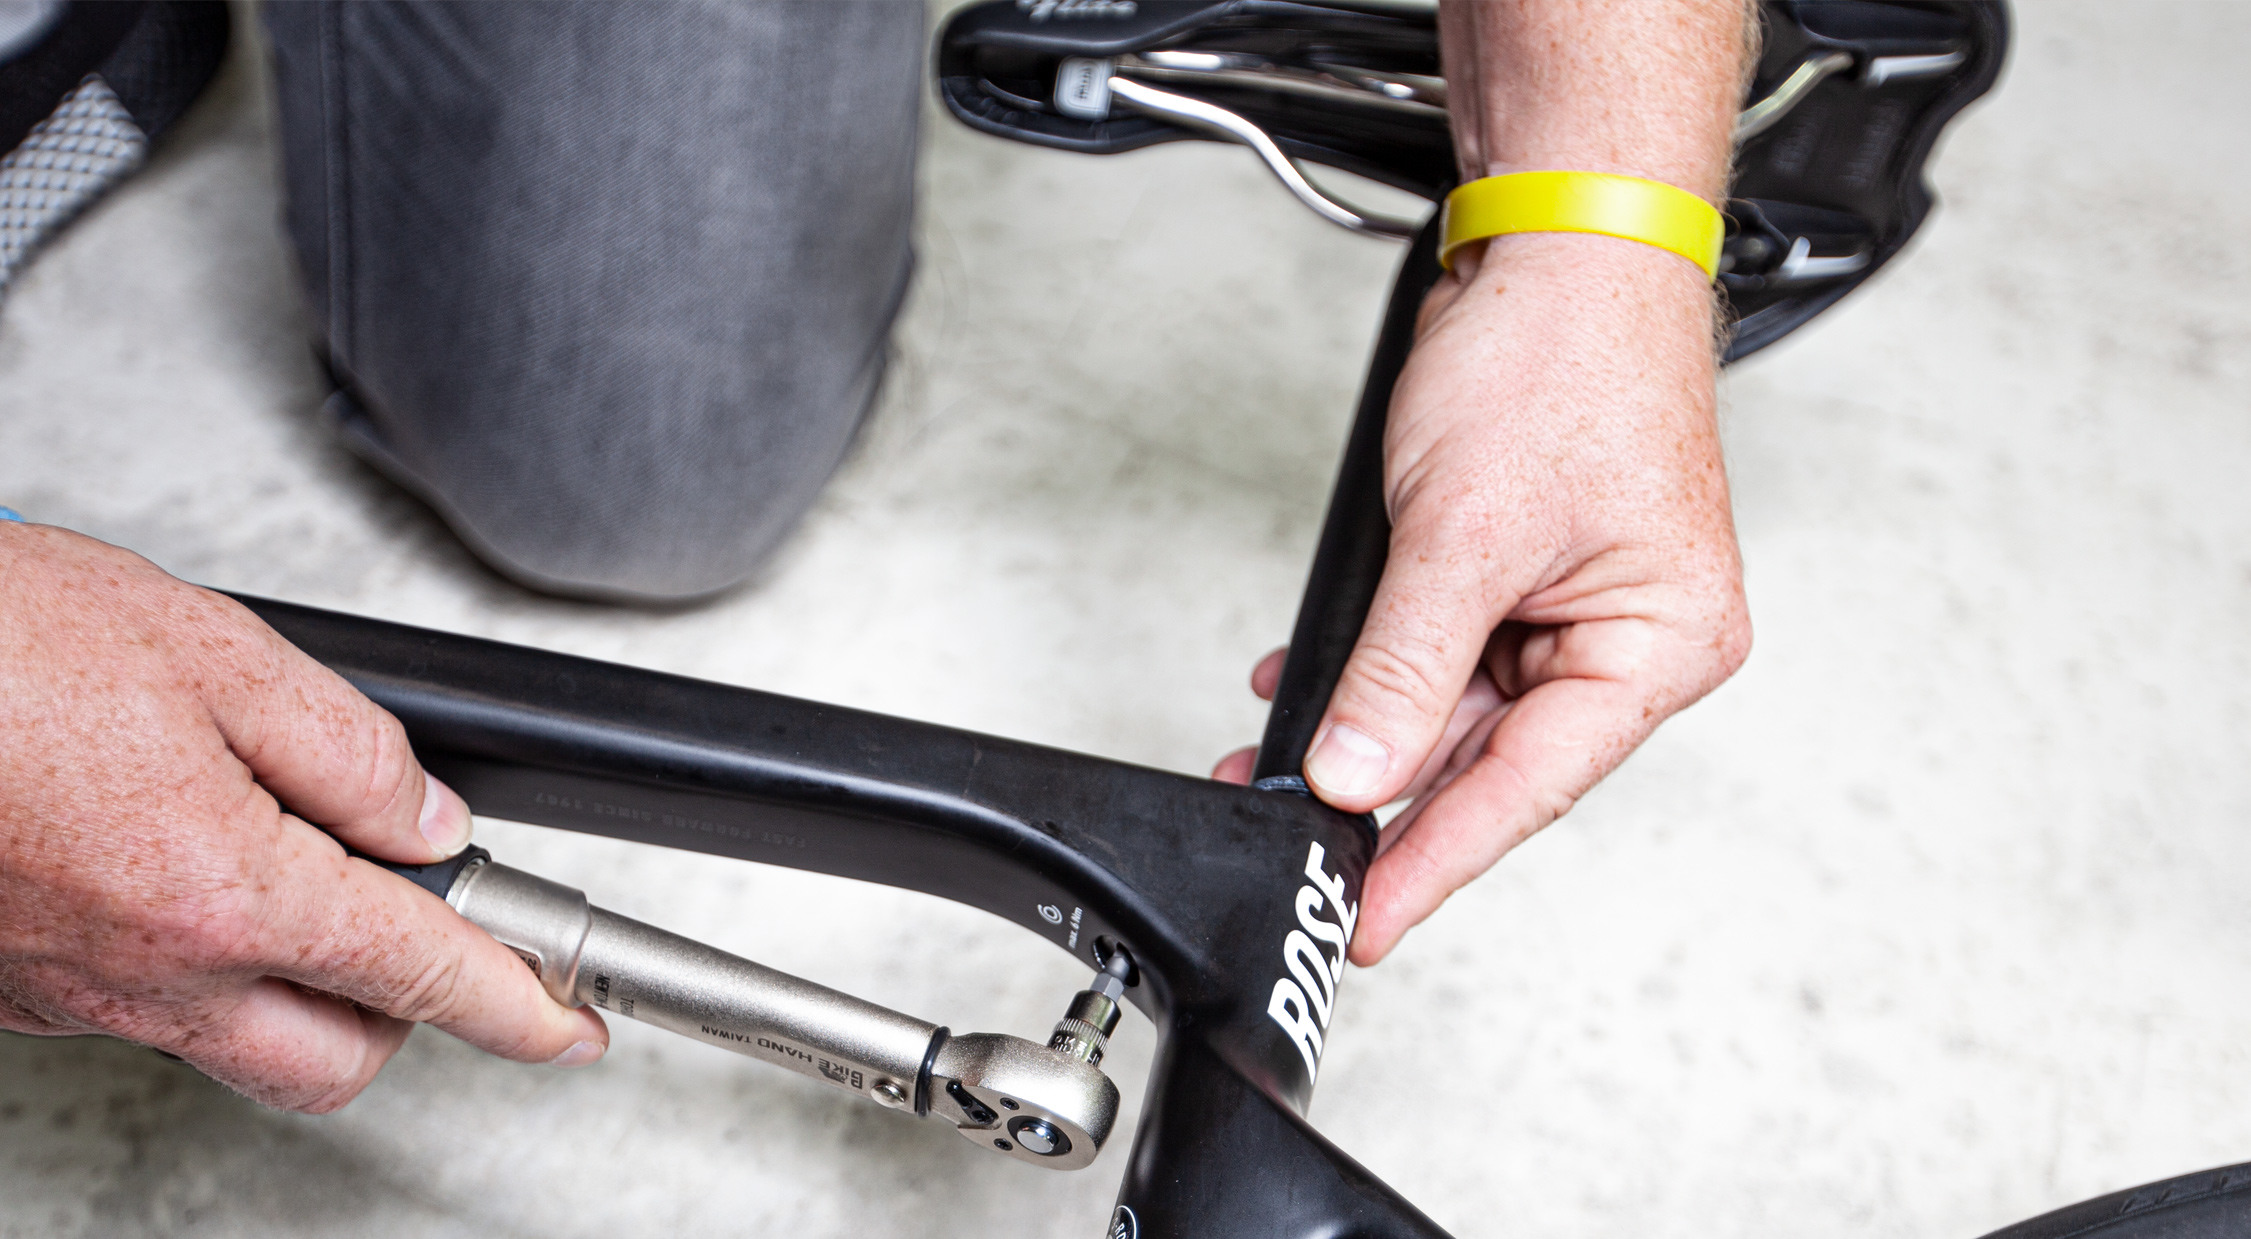
Step 5: Insert the seat post
- Loosen the seat clamp bolts
- Slide the post into the frame and follow the maximum and minimum insertion recommendations
- Tighten the seat clamp bolts (to the required torque)
- If you have a Di2 model, make sure to plug the connector in with the supplied tool
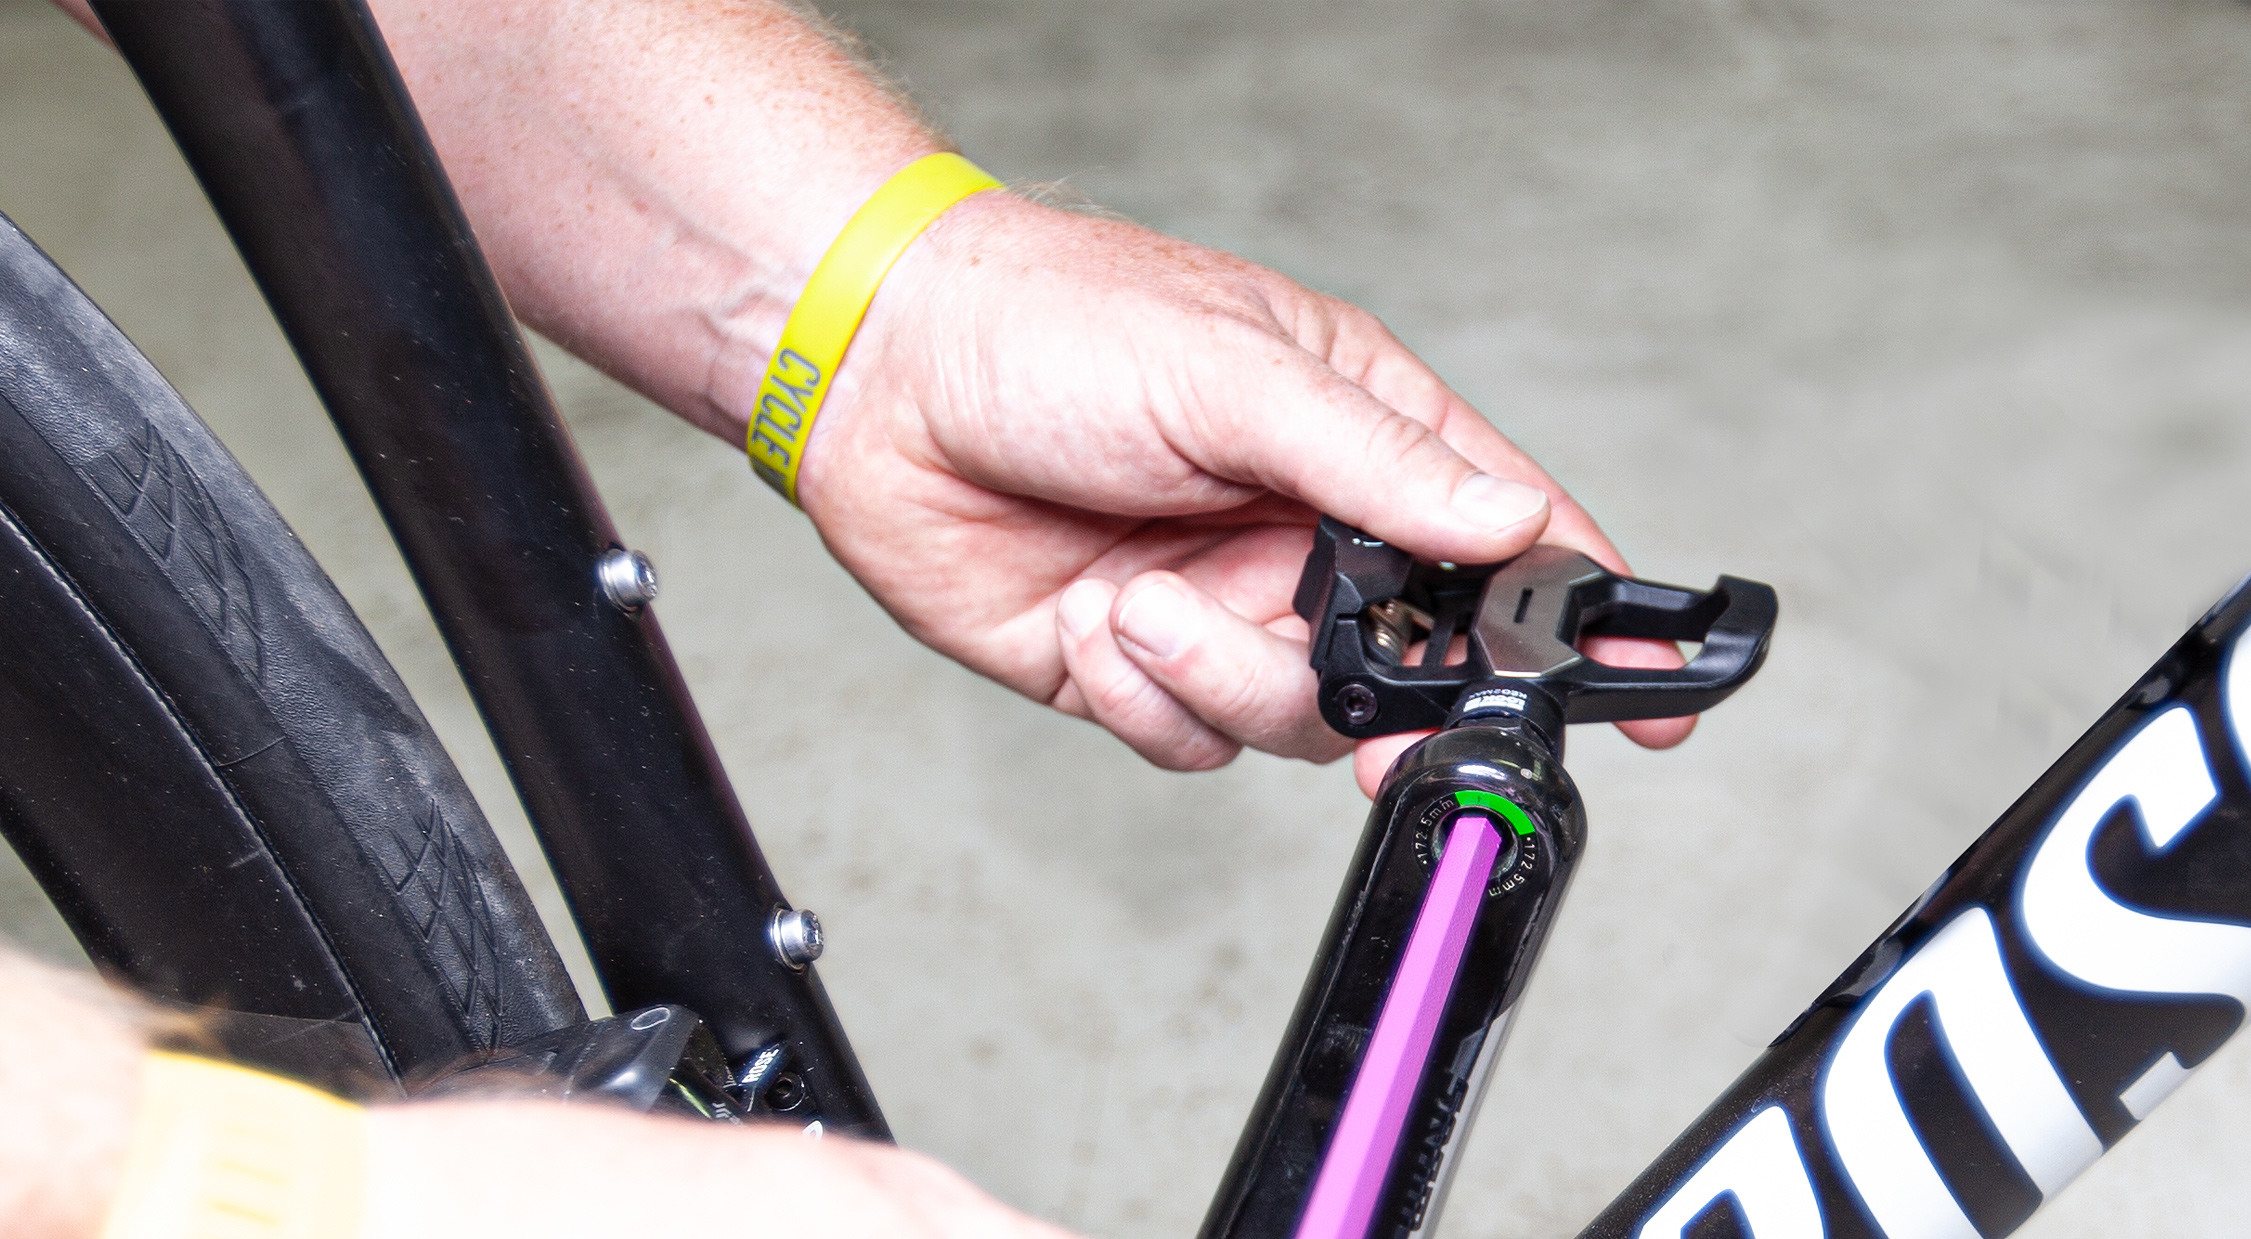
Step 6: Installing the pedals
- Most pedals have a groove around the spindle or a different marker to mark the left and the right pedal
- Place the pedal thread into its side’s crank arm
- Tighten the pedals according to the manufacturer’s instructions